How to install
SSL certificate?
To install SSL on your hosting, follow the steps below
How to install SSL certificate?
Attention: Before starting to install SSL certificate, you need to enable SSL on your hosting as instructed
To perform the installation, you must already have: PRIVATE KEY (you get it like all the other files where you buy the certificate), CERTIFICATE, a file named ***.ca-bundle containing root and intermediate certificates.
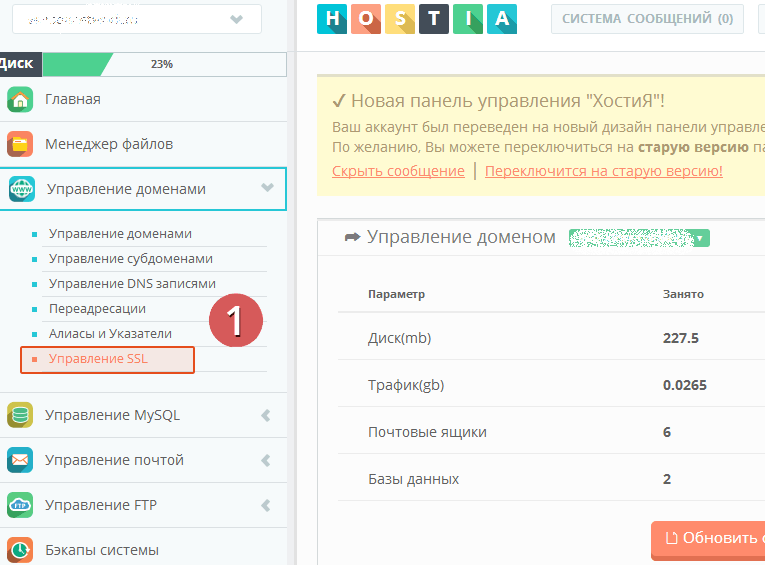
1. In the menu select "SSL Control".
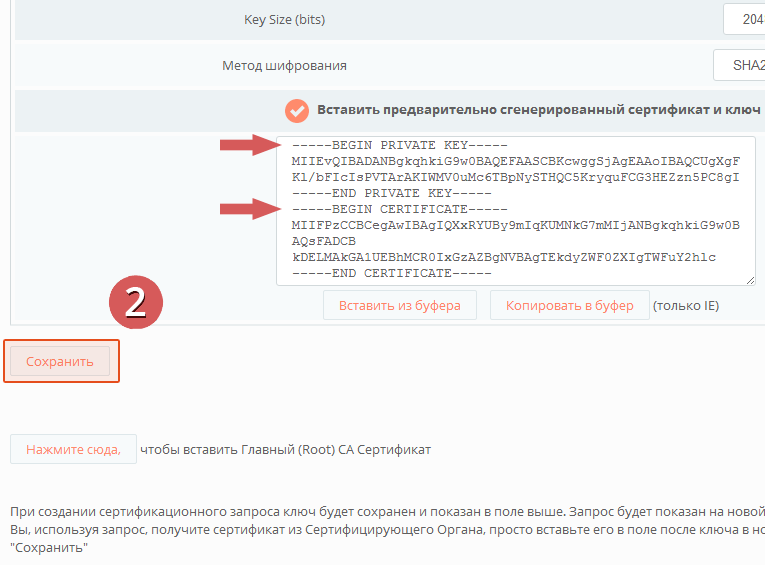
2. Copy the PRIVATE KEY. Copy CERTIFICATE under the PRIVATE KEY and press "Save".
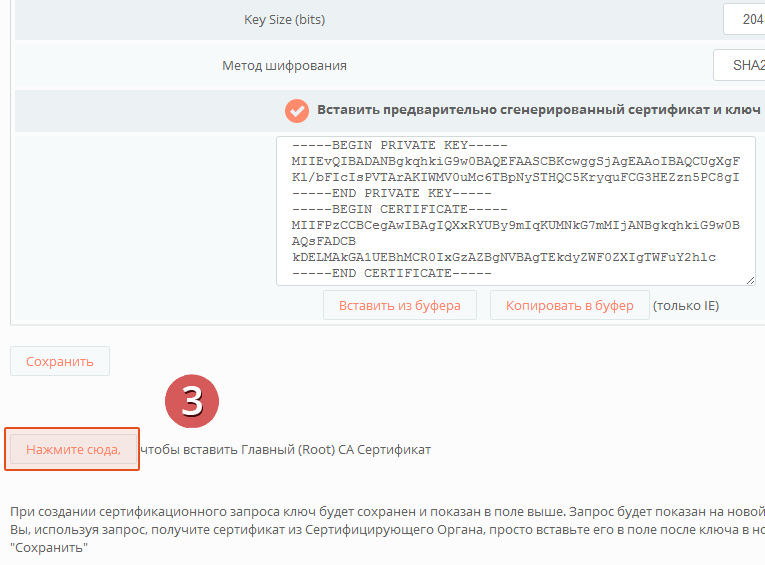
3. Go back to "SSL Management" (item 1).
Click here to set the CA.
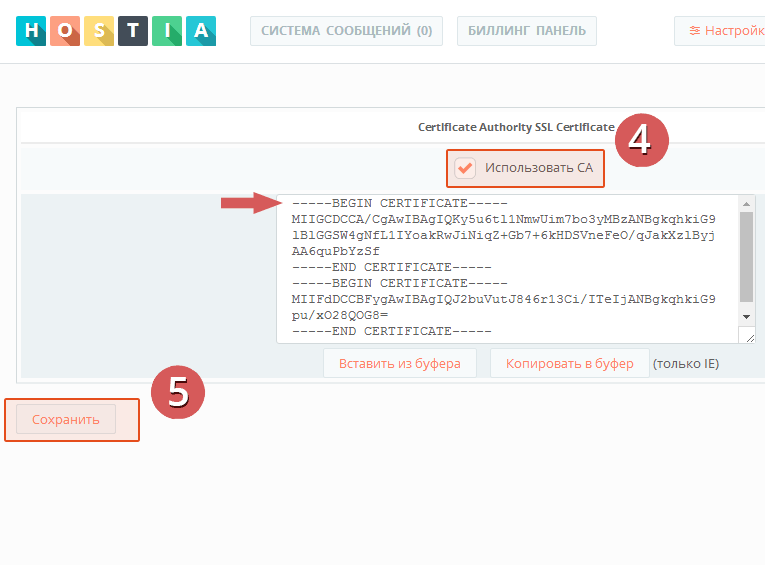
4. Check "Use CA". Copy the certificates from the ***.ca-bundle.
5. Press "Save" and wait a minute.
6. In a browser, visit your website via HTTPS://his_domain
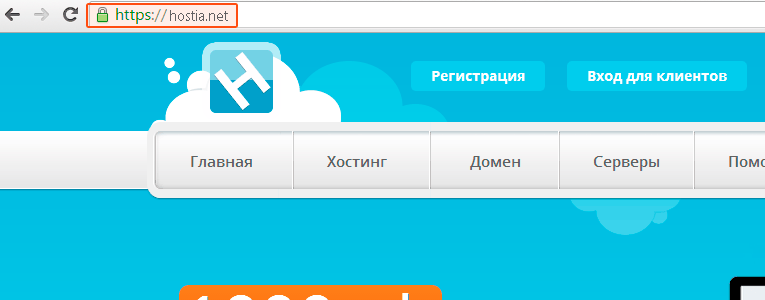
After installation SSL:
If this is correct, the address bar of your browser should show "HTTPS://same_domain" when you go to your site that it is protected.
If there is no green icon next to the website address in the browser, the cause is usually mixed content (downloading of images, css styles, etc. via links http:// in the website code).
In this case Change all links that load css styles, js, images, and other data from http:// to the protected https://
To automatically redirect to https://, write the following code in the ".htaccess" file:
RewriteEngine On
RewriteCond %{HTTPS} off
RewriteRule ^(.*)$ https://%{HTTP_HOST}/$1 [R=301,L]

Hosting for 0.75 USD per month!
Get fast hosting with high-quality support. Use our bonuses, like free domain, free SSL, and others.
- We guarantee fast hosting!
- High-quality service and low prices!
- Round-the-clock access to the site for 99.9%
After login, additional order management options will appear.
Not registered?
New account registration
0 + customers have chosen Hostia.Net

